Setup
The first visit to a fresh instance lands on the setup page. It creates the GitHub App that Knecht signs in with and reads repositories through. This page walks through that flow, then through the settings you need before the first project: who can sign in and the AI provider. Every issue tracker has its own page under Integrations.
Creating the GitHub App
The setup page has one button, "Create GitHub App". Knecht does not ask for client IDs or secrets. It sends a prefilled manifest to GitHub and gets the credentials back. The app is created under the account that clicks the button, and that account becomes the owner of the instance.
Confirm the App on GitHub
GitHub shows the prefilled app with the name Knecht <your host>. You can edit the name, everything else is set by the manifest. The app requests write access to contents, pull requests, and issues, read access to metadata, and subscribes to pull request, issue, and issue comment events. Submit the form.
Install the App on Your Repositories
GitHub hands the credentials to Knecht, which stores them encrypted and sends you straight to the installation page. Pick the account or organization, then either all repositories or a selection. The app is public, so it can be installed on any organization you administer, not only on the account that created it. Repositories can be added later in the app's settings on GitHub.
Sign In
After the installation, GitHub redirects to the login page of your instance. Sign in with GitHub. The same app handles login, so there is no separate OAuth setup. You land in the dashboard as the owner.
Inviting Your Team
Only GitHub accounts on the member list can sign in. Everyone else sees "Access denied" after the GitHub login. The list is under Settings > Access. Enter a GitHub login and click "Invite". The account can sign in right away, its name and avatar show up after the first login.
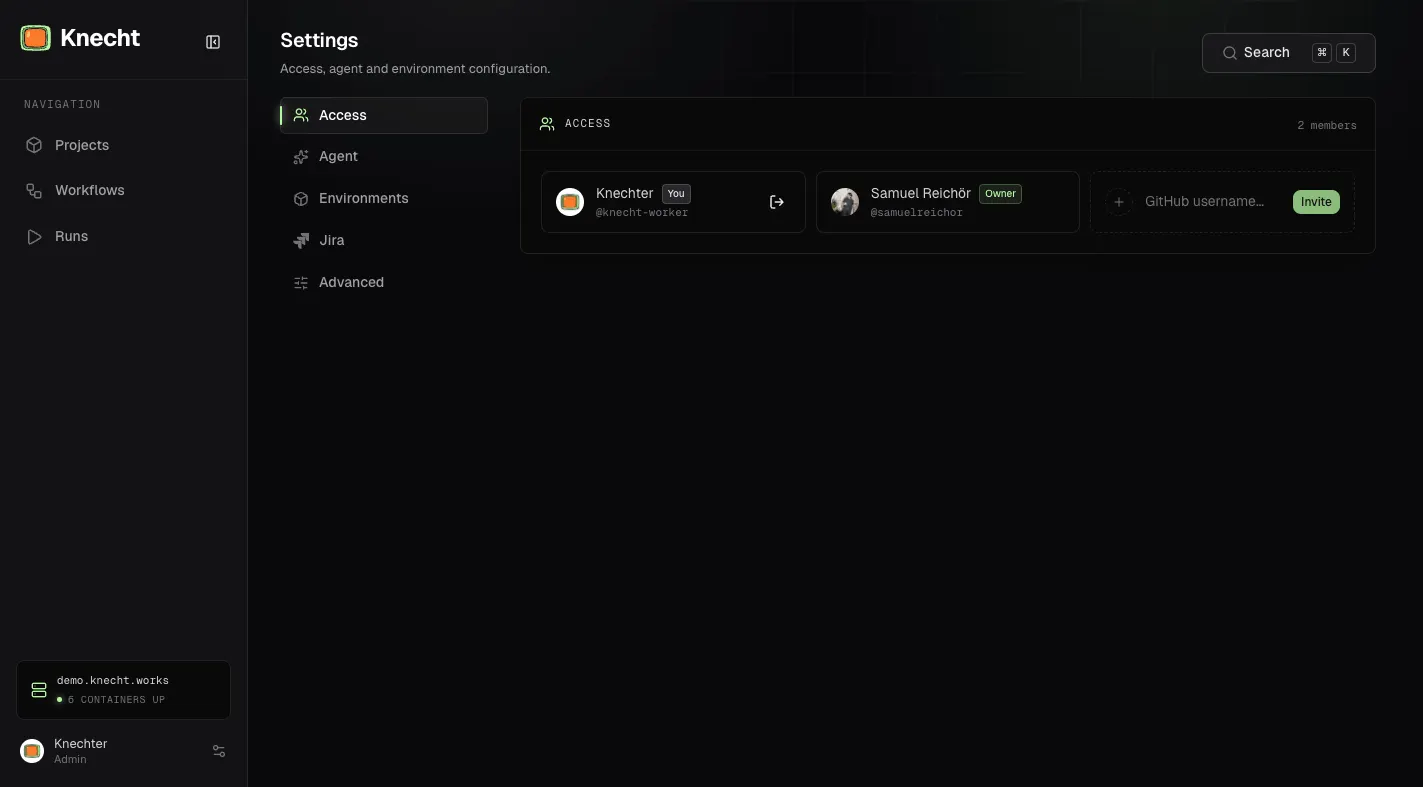
Every member has the same access as the owner, including inviting and removing members. The owner is the account that created the GitHub App and is the only member that cannot be removed.
Connecting Integrations
The AI provider is required for the AI action and lives under Settings, Agent. Issue trackers are optional and live under Settings, Integrations.
AI Provider
The AI action runs an agent inside the run's environment, authenticated against one provider with one key. Under Settings > Agent, pick the provider, paste the key, and choose a default model. The key is stored encrypted and is not shown again. Supported providers:
- OpenCode Zen and OpenCode Go, two separate plans. Both take a service account key (
oc_sk_…) from the OpenCode console. Pick the plan you pay for, the model lists differ. - Anthropic, OpenAI, and Google with their own API keys.
- Langdock, a gateway with an EU or US region. The region applies to every request of the instance.
The model list comes from the selected provider. For OpenCode it comes from your workspace, so models disabled there do not show up. The optional subtask model is used when the agent delegates smaller tasks. Each AI step in a workflow can override the default model. The instructions field on the same page is covered on AI Agent.
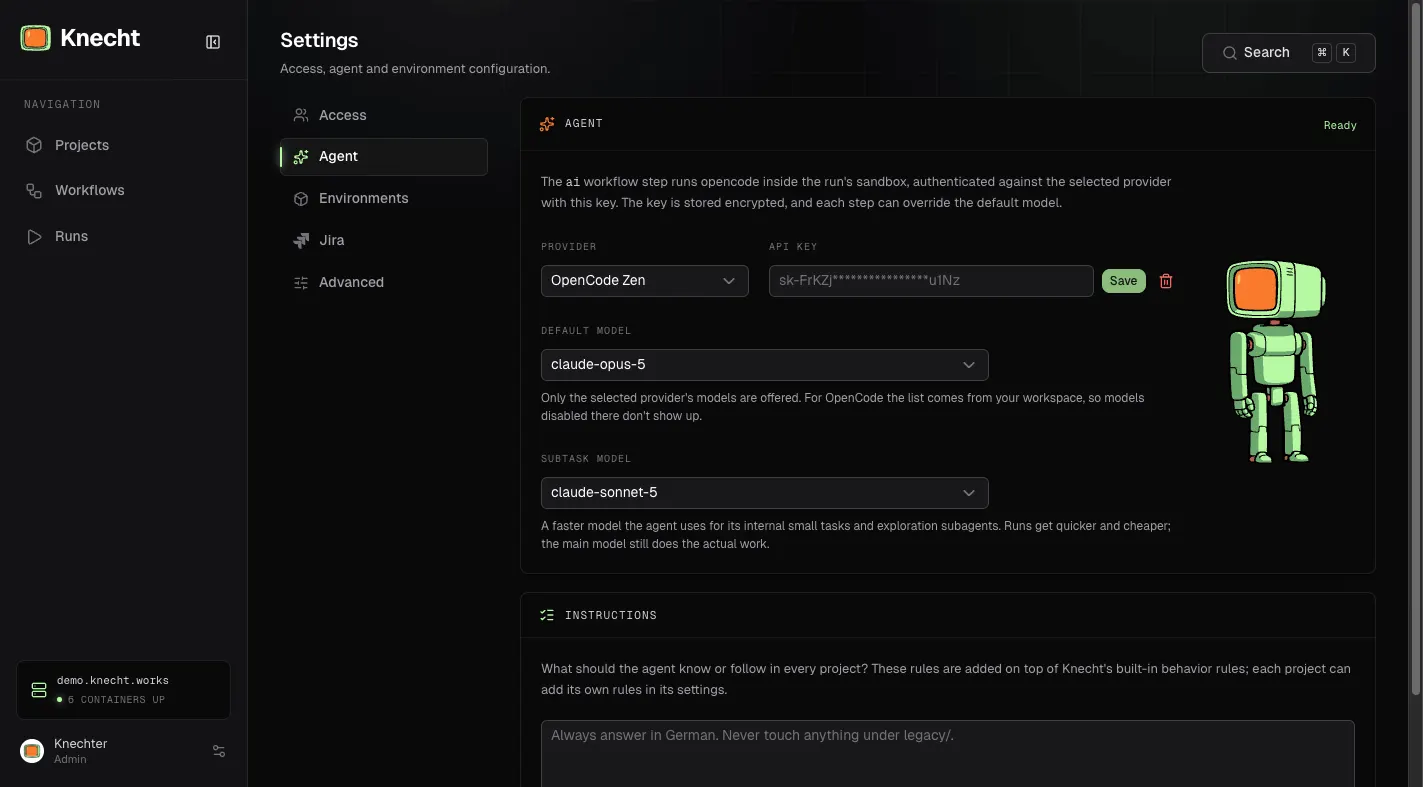
If the installation preset the key, for example through KNECHT_AI_KEY, the field is locked in the dashboard and shows "Preset by the installation".
Issue Trackers (Optional)
Issues in a connected issue tracker can start workflows, the agent answers on them, and finished runs comment the pull request link back on them. Each connection needs an API token, a webhook registered in the tool, and a link between each project and its counterpart there. Which tools are supported is listed under Trigger Types, and the Setup section of each tool's page walks through all of it.